
I began making this card over a week ago. I knew the ‘look’ I was aiming for, but at each stage of the making I stopped and kind of ‘fell out’ with the card. Something was nagging at me, telling me I didn’t like it. But I kept going back to it and doing a bit more, and a little more .. until it was finally finished on Saturday, and now it’s made, I LOVE it.
It has a sort of steam-punkery feel to it, but not. A kind of vintage feel – but not. A bit of a fantasy thing – but not. I actually can’t pin down what type of descriptive ‘category’ it fits into. Perhaps you can help me with that one, because I’m stumped!
But … I’ll talk about the making of it:
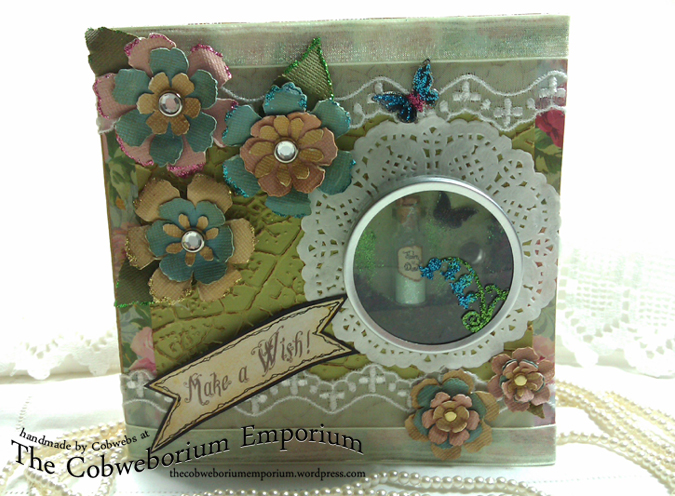
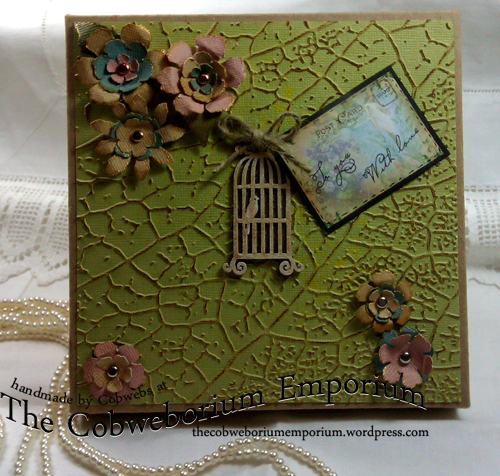
I forgot to take photo’s of the first couple of stages, so you’ll have to imagine that you saw the paper I layered down on the 6″x 6″ scored and folded Kraft card, (a vintage style paper with a duck egg blue background and roses of various colours and sizes all over it) which I ‘vintaged’ the edges of by blending some warm brown ink from a stamp pad using a bristle blending brush. Onto this I layered a 5×5″ piece of lush green coloured card which I’d embossed using the Crafters Companion ‘Leaf Vein’ Textures Embossing Folder. (LOVE this embossing folder!). I gently ‘scuffed’ the raised leaf vein embossing by dragging the same brown ink pad which I’d used to blend the base paper across the embossed veins, in order to give more importance to the texture and make the veining stand out even more.

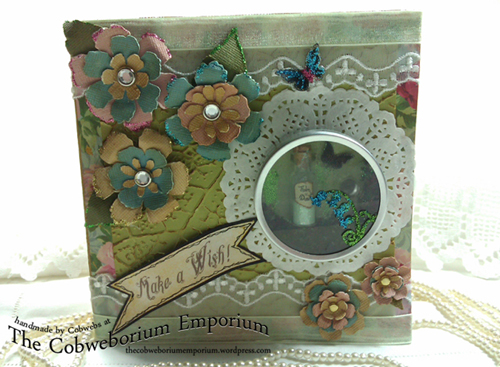
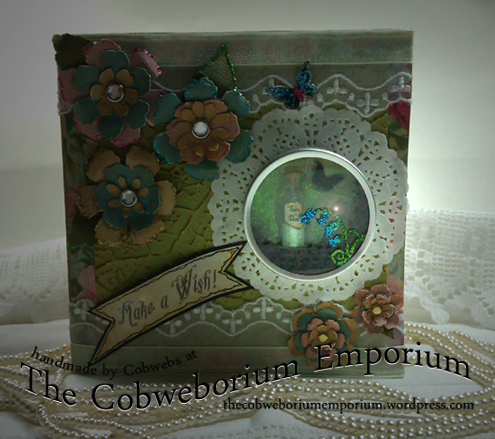
I then ‘topped and bottomed’ the card with some of my most favourite lace in my collection, and then added a narrow piece of fresh green organza ribbon over the top of the lace, just to bring the colour out of the card. . . . . . . Now came the fun part.

Adding the paper doily was something I knew I wanted to do in order to draw the eye to what I was going to make as the main part of the front of the card. The flowers were made myself, using a Tim Holtz die (which I’ve had for ages and really don’t use enough – tsk tsk), and some scraps of cardstock in pink, blue and a mustardy yellow, with a scrap of green card for the leaves. I cut the flowers out on my Big Shot machine in my craft room, but then took them all into the living room and spent an hour shaping and putting together while I watched a film on TV. The butterfly was from a small box I keep in my craft room, filled it with any left over die cuts which I don’t use at the time.
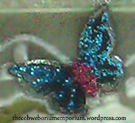
I added some WOW glitters to the tips of some of the petals of the flowers, and the wings of the butterfly.
Then came the ‘WISH’ ….
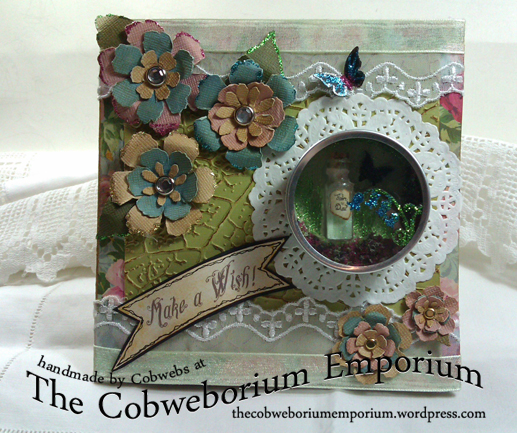
I have a few of these little, lightweight tins with clear lids (sometimes used for Wedding Favours – but I use them in crafting for all sorts of things). I cut a piece of mottled green paper and fixed it to the inside of the tin. I then put some multi coloured Flower Soft just around part of the bottom of the inside and left it on one side to dry. I then worked on the lid.
In my little tin of ‘saved die-cuts’ I had a tiny little stem of blue bells, which was left over from a card that I’d made ages ago, and I knew these bluebells would look perfect on the lid of this little box. So using some glue, I glittered the blue bells to turn them from plain black, into something more magical and pretty, and fixed them to the clear lid of the box.
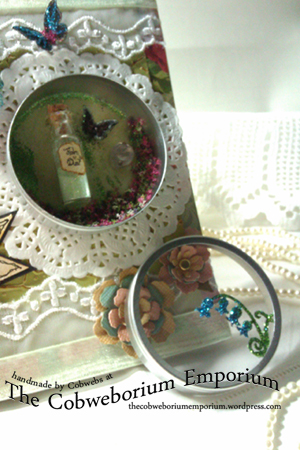
Then I went back to the little tin box and added some wiggly lines of glitter to the green paper base, and then fixed the crystal glass Fairy Wishing Ball. This was probably the most fiddly bit. Keeping that incy, wincy, tiny, little crystal wishing ball in one place would have tried the patience of an Angel with nothing on her mind!! But, in the end, I won and anchored that baby in the right place, and then added the teeny bottle of Fairy Dust.
All that was left then was to add a very small die cut butterfly, and the little tin box was all finished.
But .. the card wasn’t. The ‘Make a Wish’ sentiment was computer generated (I used a fabulous fancy font), printed out onto some white cardstock, matted onto some black card then cut by hand, and shaped so that it curved out from the card and stood proud, just a little.

I wanted to make this a card of wishes, plural. Not just one wish, but four. So … for the inside of the card I made a tag …

The tag has two more wishes hidden inside the card … a tiny little resin Wish Bone, and a Dandelion head .. ready to blow!
Of course … the card had to have a box. You couldn’t send this in a regular envelope because of the depth … so I made it a matching box.

Once I’d finished this card I stood back from it and gave it a long look … and loved it. I wish I was a better photographer because in real life this really is such a pretty card, with a kind of magical promise about it. It’s not a card for a child, but for someone older, perhaps a mom, or friend, aunt, cousin, work colleague … someone who believes in the power of a wish. Someone who needs to feel that you’re wishing them good luck … and wants them to wish it for themselves. Someone with a birthday, who no longer has candles on their cake which they can wish upon as they blow the candles out.
Fairy Dust isn’t just for children. Fairy Dust, Fairy Wishing Balls, Wish Bones and Dandelion Wishes are for people who believe in the magic of their dreams.
Thank you SO much for coming to visit today. I very much appreciate your company, and thank you for the time you’ve spent with me here.
Please feel free to leave a comment behind before you leave. I love to keep in contact with folks who read my blog, as it get’s us chatting together and we kind of get to know each other a little bit more. The internet can be an ‘isolation box’ for people, and I just hate that. So let’s get talking to each other!
I’m wishing you a truly blessed rest of your day.
Love and squidgy stuff ~


This card is AMAZING!! I love everything about it. I am in awe of how much detail you put into these things Cobs – and more than a little jealous of your talent 😉
Category wise? That’s hard. It kind of reminds me of Tim Burton or the new style of live action Disney films – fairytale with a twist. Actually come to think of it it is very Brothers’ Grimm (the actual authors not the films) before the stories are Disneyfied. Beautiful, but more earthy than the fantastical. Oh heck I’m babbling now. Whatever category it is it’s absolutely gorgeous.
Ems
LikeLiked by 1 person
Aw, thanks Ems, for such a lovely comment.
I love your idea of the Tim Burton feel for the card … but like you .. I still can’t come up with ‘the thing’ lol.
Sending love ~ Cobs. x
LikeLike
Oh Cob, this card is truly amazing and I for one am so glad you did not give up and kept returning to it….. I love everything about it, (the lace, the home made flowers etc) but that little box is truly an amazing topper, wow, if that does not help fulfil the wishes of who ever is going to be the lucky recipient of this card and box, I don’t know what will… a real labour of love and a fantastic creative make, LOVE it!!!
LikeLiked by 1 person
Hello Astrid, how tickled I was when I read your response. Thank you so much, my wonderful blogging friend.
I get such inspiration from your own makes, and they spur me on to do better each time I make something.
Sending love … Cobs. xx
LikeLike
This little card is full of creativity, well done you! I think it looks like a vintage fantasy card.
LikeLiked by 1 person
Hello Kim!
Thank you so much for your comment, and for visiting my blog. It’s really great to see you here.
Crafty hugs coming your way ~ Cobs. x
LikeLike
You always amaze me with your talent. I love when make cards. I love how you detail how you make them too, I have to admit there is always something on your cards that I initially miss and have to go back and find it after reading. It’s like a little scavenger hunt.
Getting off topic, amazing card! I love it! I think I may need to look up making card boxes. I tend to try to keep my flatter so that they fit in an envelope. Once again you inspire me!! 🙂
LikeLike
Hello Stacey.
Thank you so much for coming for a visit, it’s lovely to see you here. (I was just over at your blog, having a visit!)
Thrilled that you like the card. I wish we lived closer to each other because then we could have a craft day once a week, and craft away to our hearts content!
Sending love and big crafty hugs ~ Cobs. x
LikeLike
wow – the detail you put into yoru cards is just amazing! Would I had half yoru vision and talent! I love the bit about watching a film while yu work on flowers – I love to do things like that as well – get the pieces made, then join the rest of the household for a good show while I embellish and put things together.
LikeLiked by 1 person
My impression is that this card is timeless. It is very precious. I love the use of the tin. I thought that was very creative. I am amazed at the details you think to include in your cards.
I love the tag the best! I have a lot of fond memories of the wishbone. For a long time we saved them for a friend of my mom’s who did a ‘craft’ with them. I have no idea what it was, I was too small to ask the right questions.
LikeLiked by 1 person
I just wanted to let you know that I love this card so much I put a link to it on my latest post.
LikeLiked by 1 person
Hello my wonderful blogging friend, Kim, and wow… THANK YOU!
I’ve just popped over to your blog to see your latest post and as soon as I’ve replied to your comment here, I’ll be leaving a comment on your post.
Bless you for your linky mention, Kim. I very much appreciate it. And I’m so flattered! Your favourite? Oh my goodness!! …. I’m going to have to make sure that I never ever let you down!
Whilst writing … I’m just about to build a post to schedule as posting tomorrow morning, a card – which has something different about it and I think you might like. It has a sort of … gentleness and softness about it, but at the same time it’s got a kind of 1940’s (almost) feel. Aww … I can’t explain it, but take a peep tomorrow (Monday) and you’ll perhaps understand why I couldn’t explain it properly. I think you might like it though. ~ Sending big love ~ Cobs. x
LikeLike
I’m looking forward to it!
LikeLiked by 1 person
I just saw this gorgeous card now! So special and an incredible gift for someone special who needs a wish or four!
LikeLiked by 1 person
I LOVED making this card, so I’m thrilled that you like it too. It was such fun and had details – which is my love … I love the details in things. So this card was just so lovely for me to enjoy the making of.
Thrilled to pieces that you like it Eva.
Thank you my blogging friend.
Sending hugs to you in your corner, from me in mine ~ Cobs. x
LikeLike