

As any gardener will tell you, gardening doesn’t stop when the summer sun does, and it was this thought that made me realise that there were very few gardening or ‘plant growing’ cards for gardeners in the autumn/winter months to be seen on the high street (or on hand-made card makers blogs that I’ve come across) at these times of year, so I thought I’d make some cards for those of us who garden and pot all year round!
Card one:
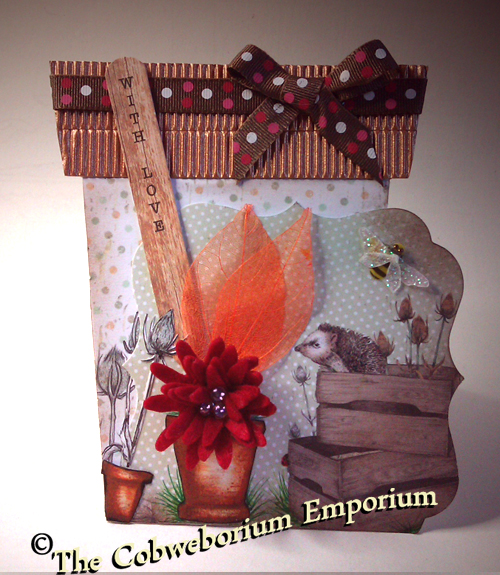
I decided upon warm terracotta and copper tones for this first card and hand painted the little pots on some Neenah card then cut them out and shaped them (just with my fingers) to give them that dimensional look.
The deep ruby-red flower is made from felt with three glass beads in the centre, and I teamed it with two lovely burnt orange skeleton leaves.
The little Bumble Bee actually started off life as a photo corner – ones which I’ve had for a gazillion years! (ok, I might be stretching that a little, but I’ve had them so long that I can’t even remember when I bought them nor where from).
The rim of the pot is made from coppery coloured corrugated card with the addition of a little brown and dotty ribbon, which brings a bit of happy whimsy to the pot rim.
I added a little smile to the inside by adding another hand painted pot, to which I added a ‘seed packet’ – cut from some cardstock which had little seed packets all over the page. I fixed the seed packet at an angle so that I could ‘sprinkle’ seeds falling out of the packet and into the pot. The addition of the sentiment ‘Sow Lovely’ finished the little inside scene off.

Card number two:
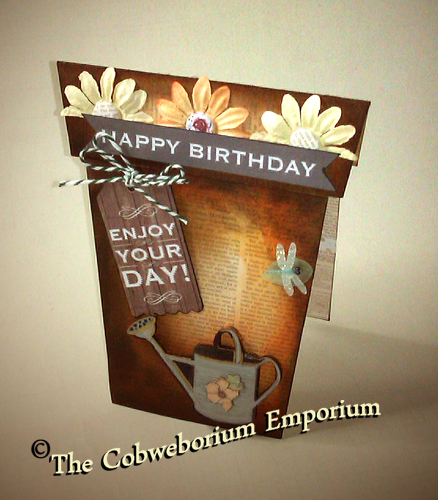
The second card began life in the same way (as a Craft Card terracotta pot shaped base) but for this card I cut out papers for the rim and the base then coloured them up so that the pot took on a much deeper colour than a normal terracotta pot in order to give it a more autumnal feel. I added three half daisies along the rim (with Candi to the centres) and added the Happy Birthday sentiment so that they looked as if they were tucked behind it.
The watering can at the bottom of the card is actually a wooden one, which I coloured silver by using a silver marker pen, and added a flower to the centre. The dragonfly, (like the bumble bee in the first card), began life as a photo corner – and again, I’ve had them for ever so can’t tell you where I bought them from – but they’re so adorable and I’ve used them lots of times. I hope that I can still get those from somewhere because I’ll buy them in a heartbeat. They’re perfect for that little accent when you need one).
This time, the inside of the card was a pop up – in the shape of some flowers….

These flowers started life as:

…7 x 2″ square pieces of decorative cardstock, folded and then trimmed to shape, then cut, coloured . . .

. . . and then glued to turn them into ‘cone’ shaped flowers . . .
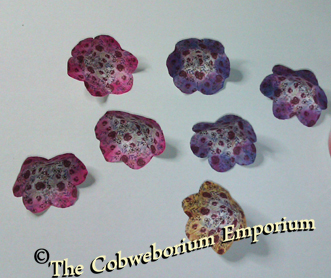
Then they’re re-folded and glued together in a specific way in order to make them close up and open again as ‘one’ pop up. Once the flowers were in place I added the little heart shaped sentiment to the inside, on a belly bar, over some printed gardening themed text paper.

And that’s all there is to it!
Two cards, both really simple, but both with friendly little smiles to brighten the birthday of someone who still likes to garden even when the sun isn’t there!
Thank you so much for taking the time to visit and check out my blog, it’s really lovely to see you here!
Have a wonderful Friday, and a truly fabulous weekend, doing whatever makes you happiest.


Those flowers are so cute. I love the way they pop up. I would have thought you’d use a die cut, but seeing the process I didn’t realize it was so easy.
I love this card.
LikeLike
Hello LemonD! Great to see you. 😀
Your right, the flowers really are easy and they’re such a lovely ‘smile’ when you open the card.
I’m thrilled to pieces that you like it.
Thank you so much for your kindness in coming to look and especially so for leaving a comment. I know it takes a few moments out of precious on-line time, but it means the world to me to read a comment left for me on one of my makes. So thank you for your kindness. x
Sending love and wishing you a fabulous rest of your day ~ Cobs. x
LikeLike
love these cards – especially the one with the pop up flowers inside – so cheerful and fun!
LikeLike
Aw, thank you WhatImUpTo!
Having been a little poorly for the last few weeks, my mojo wasn’t all it could be, and everything has been taking me an age to do. So I’m thrilled to bits that you like the cards.
I too like the pop up flowers. They’re such a surprise to find inside. (Although I think my heart belongs to the card with the little hedgehog. It’s the curiosity which is on his face which draws me to him. He’s such a little cutey!)
Have a blessed weekend, my fabulous crafty friend. ~ Cobs. x
LikeLike
I am sorry you aren’t feeling well – I hope you get better soon. Just keep doing what you can when you can, the results are amazing. And yes, the hedgehog IS adorable. 🙂
LikeLike
aw thank you WhatImUpTo. Bless your heart. xxx
LikeLike
Cobs, both of these cards are fabulous!! The details you’ve put into each are wonderful and ‘sow lovely’ indeed! 🙂 LOVE your pop up flowers in card two and I may especially love how you’re using your tiny clothes pins to keep your glued items together 😉 Clever!! They’re not just for embellishments! 🙂 XOXO-Shari
LikeLike
Laughing about the tiny clothes pins used as tools. 😀 I keep six of them in a pot on my desk so that when I need a ‘gentle hold’ I can go straight to them.
Thank you SO much for your comment Shari. Have a blessed rest of your day! ~ Sheila. x
LikeLike
These are so pretty! I just love all the detail! love the little bee!
LikeLike
LOL – yes the bee is a cutie. I’m hoping that I can eventually find these again. I wish I’d bought more of them when I did.
Thanks for the comment OnTheUp!
Have a blessed day ~ Cobs. x
LikeLike
what a great idea the plantpot shapes. Love the paper flowers too, will have to have a go at them
LikeLike
Hiya Bev. The plantpot shapes are really easy to make. It just takes some measuring out first to get the right proportions. I use just cheap copy paper to try a new shape out first and if it work then I’ll move on to make it in sturdy card stock.
Sending love, as always ~ Cobs. x
LikeLike
I have been going through your work and I must say, the little fairy shoes melted my heart. They are soooo teensy weensy cute!!
OMG! lol. Also your tags… really beautiful. The tiny key on the butterfly tag… it’s adorable!!
Hope you have been well. I have only just begun to get into a ‘routine’ and should be back in the virtual world soon enough!
All my best to you~~
LikeLike
Hello Tara!! I’m elated to see you here. Are you back home again now? I was so worried about you – with the crocodiles and the tigers. And … how is little Alea? She must be growing so fast.
Thank you for your beautiful words and comments, and am joyful that you like the fairy shoes – and the pretty tag with the key. I admit that I love that tag too, so much so that I’ve been unable to part with it. I have it displayed on my desk and it makes me smile every time I look at it.
Again, I’m thrilled to see you here. I’ll pop over to your blog in a little while and look for signs of you being back home and safe.
In the meantime .. sending love ~ Cobs. x
LikeLike