

This one is so easy that the steps to make it are all done in photographs.
(yes – it’s THAT easy!)
Another tag art tutorial, – and this one is so easy that I’ve done all the ‘instructions’ by photographs, and just adding a note or two if I felt I needed to.
Remember … your own finished tag might look totally different to mine: you might not have butterflies in mind, but baking or tool sheds. You might want to do a tag about caravans or sewing, or fishing or cooking … or just about anything. It’s not the things I’m using or the colours or even the tag shape or size. This is more about how to pull a tag together. The steps. The ideas. Sort of like a flow chart.
If, after seeing the picture tutorial you feel that you want to make a tag with the same ‘feel’ or similar colours etc etc – then you can get your own stuff together and come back and look at the pictures again as you make your own tag if it helps you to put things in order. However – I’ll tell you the things I’ve used to make this tag, as we go along, so that if you want to make one like it, or like a particular colour or ‘thing’, then you’ll have the information to get that ‘thing’.
Shall we start? OH... and remember … it’s Tag Art – it’s not brain surgery. No one is going to test you on it, or even mark your results to see if you’ve passed the test. It’s just a bit of fun, . . . and you might make something you love so much that you’ll want to frame it and put it on your wall. Or make it the main attraction on the front of your next handmade card! (Who knows … you might end up being the next big mixed media artist of the art world!)
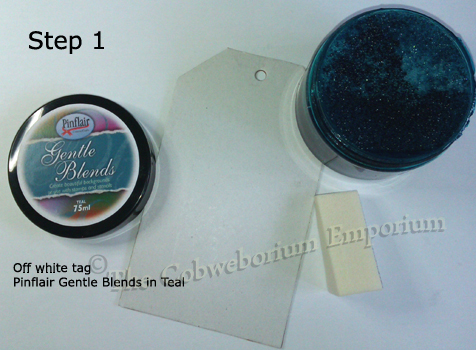
A NOTE ABOUT PINFLAIR GENTLE BLENDS: If you haven’t used Gentle Blends before – I can highly recommend them. But .. don’t ‘dab’ up too much paint as it goes a long way with just a little medium. The open pots (see the top right for an open one) have the medium in the base and a sponge on the top which soaks up the medium and that’s where you gently and sparingly dab your sponge to pick up the medium and put it on your project.

I coloured the whole of the tag in Teal. The little off white patches that you see on the tag are where the tag picked up some glue off my glass mat. Don’t worry about things like that – they kind of add to the charm of a tag. But .. if you hate it, then you could gently rub the area where the glue is with an emery board to remove the glue. Failing that .. stick something on top of the glue and hide it. No one will ever know it was there!
 Another colour … blended in a sort of oval around but leaving the central part of the tag still teal.

More Gentle Blends: this time in ‘Denim’. It’s a lovely colour, and a little darker, and slightly warmer than the two other colours. The idea here (all the different colours) is that you’re drawing the eye into the centre. You’re giving the ‘view’ of looking into somewhere lovely … somewhere like … a woodland fairy glade.
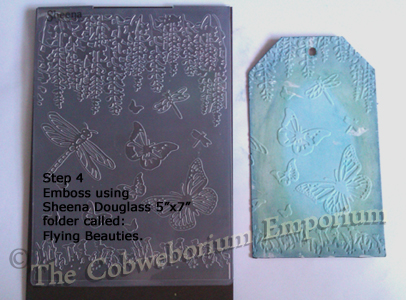
Now remember … although I’ve embossed using a Sheena Douglass embossing folder (shown here with a bit of dark card inside it so that you can see the whole of the embossing ‘picture’ that’s available on this folder) – you might not have that particular folder, so use something which will ‘go’ with your own project. A tree. A fish. A window. Some flowers. Whatever you have, use that.
BUT .. if you don’t have an embossing machine then that’s fine too! You could use stickers. Add some stickers in the right places – but don’t go crazy with them. You don’t want to over-crowd your tag. Three/four/five stickers would probably be fine.
OR… if you don’t have stickers – then use pencil/pens/markers – and draw something which ‘goes’ with the theme of your tag.
 Not too much warm brown … just enough. Don’t muddy the colours you’ve already got there.
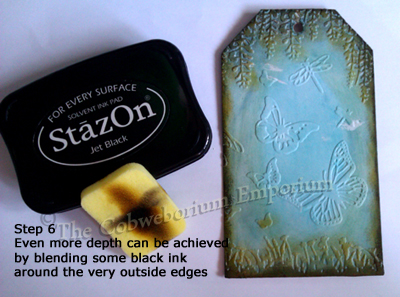
Be very sparing with black on your tag (Unless your tag is a dark, deep looking tag which you’re going to put brighter colours on top of).
Black can turn a card into something way different from you started out making. So keep stopping and checking. Pick up your tag and hold it at arm’s length. Squint at it (half close your eyes) if it helps you to see it in a sort of ‘detached’ view.
 A photo looking ‘across’ the tag so that you can see a little of the depth to the embossing.
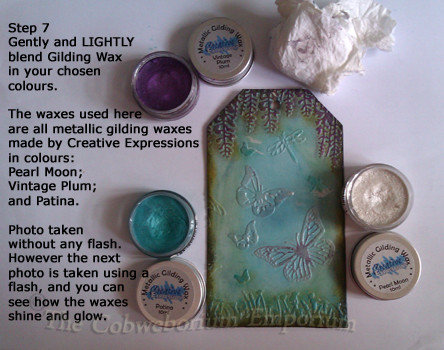
But, I hear you ask… “What if I don’t have any gilding wax?” …
No problem. Find some paints or ink pads or even water-colour pencils – anything which will allow you to pick up colour on your finger – and put a tiny bit of either paint, or chosen colour of ink pad, or water-colour pencil (which you’ve added the water from a barely damp brush to), on a glass mat, or blending mat, or heat/glue resistant mat – … – and then using your ring finger (ring finger because it gives the lightest ‘tap’), tap a little of your coloured medium onto your finger and gently either dab or stroke it onto the tag where you want the colour to be.

 ‘Metal’ – I missed the word ‘metal’ from the above – it should have read ‘with a larger, vintage looking, metal butterfly’.
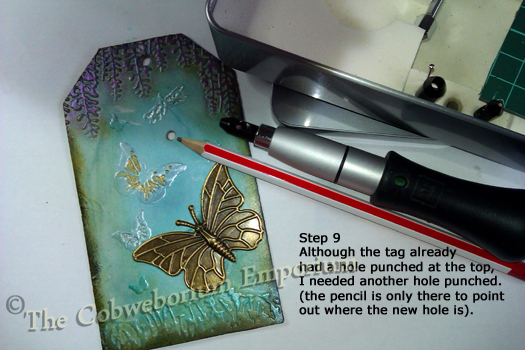


Another reminder: If you’re doing a tag about golf or fishing or baking or sewing or … well whatever your tag is themed around – then use the eyelet hole to attach a fishing rod; golf club (mini one not a big one silly! lol); rolling-pin or something bakery themed; sewing machine embellishment etc etc etc.

The two extra tags … I’d printed out some words which I die cut with a free set of three dies which I’d got with a magazine about a year or so ago. I die cut the words on the white paper, using the medium sized die; and then cut a tag in brown card using the largest die.
I blended some of the teal Pinflair Gentle Blends – this was from the teal remaining on the sponge (I didn’t add any extra), around the outside of the white tag and then glued the white tag to the larger brown.
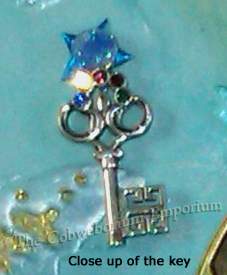
I worked out where the hole for the brad and key had to go and once I’d ‘threaded’ the key onto the brad and pushed it through the star eyelet hole, I then popped the glued together tags onto the back and opened the ‘wings’ of the brad behind them so that everything was held together, but the tags were able to move freely and so could be opened and closed behind the big tag.

Almost finished! . . .
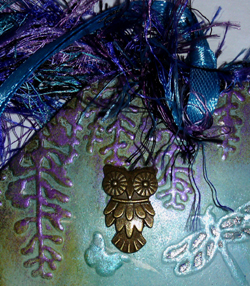

I’ve taken this last photograph without the flash so that you could see the details all together ‘as one’.
If you saw it with the naked eye, it glints and twinkles and actually does have something magical about it, which kind of makes your eye dance across the tag from one place to another.
I so hope that these ‘pointers’ are helping anyone who has some doubts about making tag art. There really isn’t anything to it. You just have to remind yourself that it’s only a tag and if you make a mistake … it’s not a mistake. It’s a happy accident which happened because something is trying to tell you to use that ‘happy accident’ as a kind of road sign and telling you to go ‘this’ way.
Thank you so much for coming and for having a read. Take a look around while you’re here!
Have a truly fabulous rest of your day. Happy Crafting all!


That is so beautiful! I love it!!!
LikeLike
Ohh, Stacey, thank you SO much. Bless you for your kind words and for taking the time to leave a comment.
Have a truly fabulous rest of your day, my friend. ~ Cobs. x
LikeLike
Perfect!. Thanks and have a great day with the little folk under the toad stools.
LikeLike
Hello Beverly, 🙂 and .. thank you so much for your comment! Yes, having a wonderful day under these toad stools, do feel free to join us ~ the beautiful folks, the bewitched folks, the bewitching folks and me, the bewildered one. 😀 Don’t forget to bring the RIGHT KEY though or you’ll not get in! 😉
LikeLike
Love it!!
LikeLike
Aw thank you, Brenda! I’m so happy that you like it. ~ love, Cobs.x
LikeLike
Hi, Cobs! I just had to pop over for another peek at your lovely blog! This tag is stunning…and fit for a fairy! I love the dry embossing, the wonderful sheen, and the gorgeous colors. Such lovely, lovely work!
LikeLike
Ohhh Kathy, it’s so lovely to see you here. Thank you so much for your kind words, they mean the world to me.
I too love this tag. The colours turned out just as I imagined they would when I planned it inside my head.
Kathy, thank you so much both for your visit and taking the time to leave such a wonderful comment with such inspiring, positive words. Thank you, thank you, thank you.
Have a blessed rest of your day. love ~ Cobs. mmmmmmwahX XXX
LikeLike